Introduction:
Shading devices can play an important role in improving the energy efficiency of buildings. You can assess the impact of adding shading devices and fine tune their placement using solar studies in the Revit application. You can also quickly evaluate the impact of applying different levels of shading on the predicted energy performance of your building design in Insight.
In this lesson, you will learn how to:
- Create Revit models illustrating alternate shading strategies
- Visualize the shading strategies in Revit sun studies
- Evaluate the potential for impacting performance using shading devices using Insight
This video shows the workflow for evaluating the effect of shading devices on the energy consumption in Revit and Insight.
Workflow Steps:
Open the Project with No Shading Elements
- Reopen the Classroom-NoShades Revit model.
Enable Sun Path and Shadow
- Open the default 3D view and zoom in on the building.
- Click the Shadow icon at the bottom of the Revit display area to turn on the shadows for this building.
- Click Sun Path icon at the bottom of the Revit display area to open the Sun Path menu.
- Select Sun Path On to enable the Sun Path
- In the pop-up window, select the option Use the specified project location, date, and time instead to display the Sun Path.
Access and Change Sun Path Settings
- Click the Sun Path icon to open the Sun Path menu
- Select Sun Settings
- To create the desired type of solar study, perform the following changes:
- Select a Still Solar Studies
- Choose the Summer Solstice – 3pm preset.
- Click OK to apply settings.
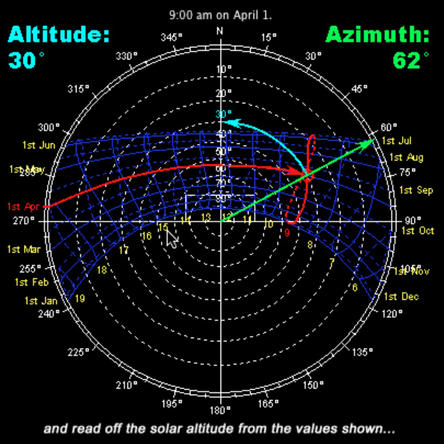
- Note the amount of sun that is directly shining on the glazing of the South façade of the building and generating cooling loads.
Generate Insights for this Unshaded Model
- If needed, generate insights for this unshaded model.
Open Another Project with Shading Elements Included
- Download and open the Classroom-WithShades Revit model.
- Open the default 3D view and zoom in on the building.
- Display Sun and Shadow information for the same Still Solar Study preset – Summer Solstice – 3pm preset.
- Return to the default 3D view.
- Note how the shading elements block much of the sun from hitting the glazing on the South façade, thereby reducing the cooling loads.
Generate Insights for the Shaded Model and Access Results
- Generate insights.
- Click Optimize to access the results.
Create a New Insight to Compare the Unshaded and Shaded Models
- Click Back to Insight
- Click Insights
- Select Create Insight.
- Select the shaded and unshaded models to be compared and click Done.
- Click the action button (three dots to the right side of the tile) and choose Rename from the pop-up menu to change the name of the Insight.
- Set the name of this Insight to Shading Devices Comparison.
- Open the Insight by selecting the tile.
Apply Shared Assumptions within an Insight
- In the Model Comparison Dashboard, select Baseline Scenario from the Scenarios drop-down menu to apply the same assumptions to all the energy models in this Insight.
- Hover over the bars to display the energy performance of each model in this insight.
Exercise:
In this exercise, we’ll focus on a more detailed version of the Audubon Center and study the sun’s path in relation to the building’s glazing and shading device design. We’ll also relate the sun’s path to the energy consumption of the building by testing different shading devices. You’ll notice that this Audubon Revit model is a bit different from previous models you might have worked with. For instance, this model features custom glazing that is representative of the actual glazing in the Audubon Center.
Download Data Sets:
In this exercise, you’ll visually inspect the sun path and subsequent shadows, then conduct an energy analysis to interpret the results. You’ll do this for three different version of the model.
Follow the steps outlined below:
- Open the “No Shades” model in Revit
- Open the Location tool and set the project location
- Change Project Address to Columbus, OH
- Select Weather Station 42407
- Visualize Solar Path
- Enable Sun Path & Shadows
- Turn on Shadows and Sun Path
- Select Sun Settings
- Select Single Day
- For Time, select the Sunrise to sunset box
- Use a Time Interval of 15 minutes
- To easily view the shadows and sun path throughout the day, select Preview Sun Settings from the Sun Path. Use the forward and back buttons to navigate through the day.
- Enable Sun Path & Shadows
- Repeat steps 3 and 4 for the remaining two models to visualize the impact of adding different shading features
- Horizontal Shades
- Features horizontal shades on the south glazing
- Horizontal + Vertical Shades
- Features horizontal and vertical shades on the south glazing
- Make sure to use Conceptual Masses mode for this exercise.
- Since the surfaces of the conceptual mass has been split in this model, the energy analysis using the Conceptual Masses and Building Elements mode will fail.
- Generate Insight
- Create an Insight for your shading analysis
- Create a new Insight and add the No Shades model to this Insight.
- Open the No Shades model and save a baseline scenario by setting a range or value for the following factors:
- Operating Schedule: 12/5
- Lighting Efficiency: 0.7 – 0.3 W/sf
- Plug Loads Efficiency: 0.6 W/sf
- Create scenarios in Insight to compare options for the window shading Factors.
- Create a scenario to test the impact of minimal shading
- Scroll down to Window Shades - South
- Set the value to 1/6 Win Height
- Save this scenario and rename it as 1/6 Win Height
- Create another scenario to test the impact of adding moderate shading
- Scroll down to Window Shades - South
- Set the value to 1/3 Win Height
- Save this scenario and rename it as 1/3 Win Height
- Create another scenario to test the impact of adding even more shading
- Scroll down to Window Shades - South
- Set the value to 2/3 Win Height
- Save this scenario and rename it as 2/3 Win Height
- Compare the results of these scenarios
- Click the Scenario compare button above the model viewer.
- Review the results of the different scenarios by comparing the heights of the bars in the Scenario Comparison window.
- Create a scenario to test the impact of minimal shading