Introduction:
The sun’s movement is an important consideration when designing high-performance buildings. To understand the impact of the solar position on your building, you can use the Sun and Shadows settings in Revit to visualize the position of the sun at your location at any time of the day or of the year. You can also see the shadows that your project will be cast upon the surroundings as well as seeing the shadows cast upon your building surfaces.
This feedback about the sun and shadow locations can help you identify surfaces that have great solar potential as well as spot surfaces that could benefit from shading.
In this exercise, you will learn how to:
- Create sun and shadow studies
- Explore important design days such as solstices and equinoxes
- Create a Solar Animation
- Save and export Solar Studies results
This video shows the workflow for creating and editing Sun Path Studies in Revit.
Workflow Steps:
Open the Model
- Download and open the Classroom-No Shades Revit model.
Verify the Project Location in Revit
- Go the Analyze tab and open the Location tool to confirm the location of the project, which is in Manchester, NH.
- Note the latitude and longitude of this location, which have a great influence on the Sun path.
- Click OK to apply settings or close the window.
Select a 3D View
- Open the default 3D view.
You can create multiple views for the project to show different facades of the building and, also create views to show the sun’s position at different times of the year. You can tile multiple views to easily compare them.
Enable Sun Path and Shadow
- Click the Shadow icon at the bottom of the Revit display area to turn on the shadows for this building.
- Click the Sun Path icon at the bottom of the Revit display area to open the Sun Path menu.
- Select Sun Path On to enable the Sun Path
- If a window pops up asking you to select the option Use the specified project location, date, and time instead to display the Sun Path, select it.
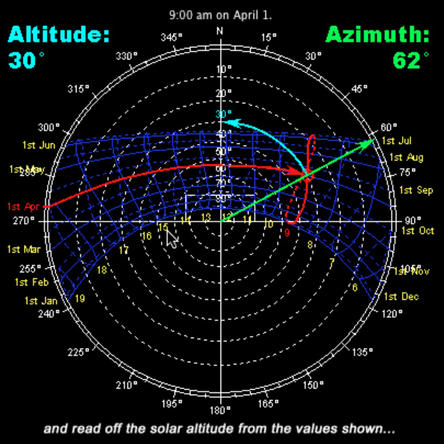
The Sun Path Interface displays the ground compass, the position of the sun, time of day, and time of the year.
Access and Change Sun Path Settings
- Click the Sun Path icon to open the Sun Path menu.
- Select Sun Settings to open the Sun Path Settings Dialog box.
- To create the desired type of solar study, perform the following changes:
- Select a Still Solar Study
- Select a preset for the solar study
- Change Settings as needed
- Click OK to apply the settings.
In a Still solar study, you can also change the time of day manually by holding and dragging the sun position along the daily path to a different time of the day. You could also change the time of the year manually by moving forward along the analemma (the figure-8-shaped path) to change the day of the year or by clicking the Day and Month (date control) to edit the day of the year.
Create and Preview a Solar Study Animation
- Click the Sun Path icon to open the Sun Path menu.
- Select Sun Settings to open the Sun Path Settings Dialog box.
- Select Single Day solar study and click OK to apply changes.
- Select the Sun Path icon
- Select the Preview Solar Study option to access the animation tools, which will appear on the option bar (top left hand side of the model display area).
Make sure the shadows are enabled in order to display them in the Preview Solar Study animation.
- On the animation control bar, click Play.
- To change the animation speed, open the Sun Settings and change the Time Interval on the settings.
- Click OK to apply settings.
- Play the animation again and note how animation speed changes as the new frame shows for every 15 min instead of 1 hr.
- Note that Solar Study animations are only available when you select Single Day or Multi-Day solar studies.
Save and Export the Solar Study Results
- To save the solar study as an image, right-click the 3D view in the Project Browser.
- Choose Save to Project as Image in the pop-up menu.
- Name the image and modify the image settings.
- Click OK to apply settings.
Images will be saved under the Renderings node of the Project Browser.
- To export a Solar Study animation, select the Revit menu and click Export.
- Select Image and Animation and from the drop-down menu, click Solar Study.
- Modify image settings and click OK.
- Select a file path to save the animation.
- Name the file, choose the file type, and save the file.
- Select the compression type; leave the compression set to Full Frame for the highest quality export.
- Click OK to export the animation file.
Exercise:
In this exercise, you will relate the positioning of a building on a project site to the path of the sun. There is an emphasis on understanding how studying the sun can influence solar envelopes and massing and orientation.
Download Data Sets : Revit 2017 - Audubon_Site_2017.rvt
While the reality of the Audubon site is that it is surrounded by trees and parks, let’s consider how the design of the Audubon building could have been different if there were surrounding buildings. In this scenario, consider the area around the original Audubon site has become lightly developed. There is a residential neighborhood with single family homes and townhouses to the north. A retail center is now to the west. There are also plans for a new office building. Designers need to consider the massing design for the Audubon in addition to the placement of the new office building. See the image below for explanation.

- Open the Audubon-Site model in Revit
- Set Project Location
- From the Manage tab, select Location
- Change Project Address to Columbus, OH
- Select Weather Station 42407
- Study Design Option 1: EW Orientation_Office S
- This design option features a similar massing and orientation of the Audubon Center with the office building proposed to the south.
- (Design options allow differing modeled geometries to be studied within the same model. They allow for the simplistic management of different design scenarios.)
- 3a. From the Manage tab, use the Design Options dropdown to select the option
- 3b. Enable Sun Path & Shadows
- Turn on Shadows and Sun Path
- Select Sun Settings
- Select Single Day
- For Time, select the Sunrise to sunset box
- Use a Time Interval of 15 minutes
- To easily view the shadows and sun path throughout the day, select Preview Sun Settings from the Sun Path. Use the forward and back buttons to navigate through the day.
- Repeat 3a and 3b for the other design options
- EW Orientation_Office SW
- Actual massing and orientation of the Audubon Center with the office building proposed to the southwest
- HighDensity_Office S
- Alternative proposed massing of the Audubon Center that has the same floor area as the EW Orientation massing. Office building is proposed to the south.
- HighDensity_Office SW
- Alternative proposed massing of the Audubon Center that has the same floor area as the EW Orientation massing. Office building is proposed to the southwest.
- EW Orientation_Office SW