You are here
Introduction:
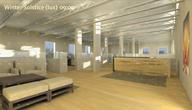
The Insight Lighting tool can compute the daylighting available in the rooms of your building model and report how each room compares to daylighting levels required for LEED compliance. The daylighting levels are computed at two specific times dictated by LEED – the fall equinox at 9:00am and 3:00pm.
The results of the daylighting analysis is reported through color maps that help visualize the daylighting levels on a plan view of each floor level and through schedules that summarize the daylighting performance by room and by floor level. A high-level summary is also reported showing the number of LEED points earned by the entire building based on the daylighting performance in all of the relevant rooms.
This video shows the workflow for creating lighting analysis studies in Revit.
Workflow Steps:
Open the Project
- Reopen the Classroom-WithShades Revit model.
For a lighting analysis, you need to use a building element Revit model or the analysis will not work.
If you do not want to use your Autodesk credits for this exercise, you can download the Classroom-WithShades-AfterLightingAnalysis.rvt Revit model and skip to the ‘View Analysis Results in Revit Views’ step.
Create a New Insight Lighting Analysis Study
- Click the Analyze tab and select the Lighting tool in the Insight panel.
- Select Continue in the dialog box that provides resources and best practices for conducting a lighting analysis study.
- Select a new or past analysis; then, click Go.
Edit the Daylighting Study Settings
- In the Lighting Analysis in the Cloud dialog box, select the analysis type.
Use LEED v4 EQc7 opt2 to create a daylighting analysis study that meets the latest LEED requirements.
- Select the floor levels for which a Lighting analysis should be created. Choose level 03-Floor.
In order to complete the analysis for zero cloud credits, you are limited to selecting a single level to analyze at one time.
- Choose the lower resolution – 72 inch grid – for this analysis for quicker results and fewer cloud credits.
- Click Check price to check the credits needed to run the analysis.
Cloud Credits will not be charged until the analysis is complete and accepted.
Start Analysis
- Select Start Analysis to begin the simulation.
The Revit model will be uploaded to the cloud rendering engine, and you should keep the model open as the analysis is completed. Revit will notify you once the results are ready.
- When prompted, click OK to save the project.
- Accept or Decline the cloud credit charges. Click Accept, Update, and Save Project.
Be sure to save your project after the results are accepted. If the project is closed without saving, you may be charged to download the results again.
View Analysis Results in Revit Views
- In the Analysis tab, select Lighting from the Insight panel.
If you are using the Classroom-WithShades-AfterLightingAnalysis Revit model, an additional window will open. This window displays the runs from other users and warns you that they are not available for you to use. Click OK, since you only need the last run of the Lighting analysis.
- In the Lighting Analysis in the Cloud dialog box, select a past analysis to populate results in the active 3D view. Then, click Go.
- A Lighting Analysis Report Summary appears summarizing the percentage of rooms meeting the LEED requirements at each of the required test times and the number of LEED points that will be earned by the current design. Note this information and close the dialog.
Lighting views are automatically created to easily access results in floor plan, 3D, and schedule views.
- Open the _Lighting Analysis – 03 – Floor plan view and zoom in on the area of the building to see a color map indicating the amount of daylighting available in each room.
A legend is also displayed. You may need to zoom out to the full extent of the view; then, select and move the legend closer to the building for easier viewing.
Remove Rooms that are not Required to be Considered for LEED Compliance
- Open _Lighting Analysis Room Schedule in the Project Browser.
Any changes made in the schedule do not require you to re-run the Lighting analysis.
- Uncheck the rooms that should not be included in the daylighting analysis – rooms that are not regularly occupied such as toilet rooms, Mechanical and Electrical rooms, and Storage rooms.
In the pop-up dialog box indicating that the lighting model has changed, select Continue as you make changes to the room schedule.
Regenerate the Results Summary
- Click the Analyze tab and select the Lighting tool from the Insight panel.
- In the Lighting Analysis in the Cloud dialog box, select past analysis to update results.
- Click Go to refresh the Results Summary using your changed settings entered in the Lighting Analysis Room Schedule.
Exercise:
This exercise will focus on determining whether a building meets LEED IEQ credit criteria. Specifically, if the Audubon Center receives enough daylight at pre-specified times of year. The exercise uses the automated daylighting analysis for LEED plugin for Revit.
In this exercise, you will learn how to run an automated daylighting analysis for LEED, as well as how to modify the model and regenerate results. This exercise will also teach you how to prepare your Revit documentation for LEED submittal.
Download Data Set: Revit 2017- AudubonLEED_Daylighting_2017.rvt
Follow the steps outlined below, and then answer the corresponding questions. Before you begin, be sure to have the automated daylighting analysis for LEED Revit plugin downloaded. Students can access the plugin here.
- Open the AudubonLEED_Daylighting model in Revit.
- Open the Location tool and set Project Location
- Change Project Location Address to Columbus, OH
- Select Weather Station 42407
- Click the Analyze tab and select the Insight Lighting.
- Select <Run New Analysis> and then, click Go.
- In the “Lighting Analysis in the Cloud” window, choose the following:
- Analysis: LEED v4 EQc7 opt2
- Levels: FIRST FLOOR
- Resolution: 72 inch grid
- Click Check Price, and then, click Start Analysis. Wait for analysis to complete.
- View analysis results
- Click the Analyze tab and select Insight Lighting.
- In the “Lighting Analysis in the Cloud” dialog box, select past analysis to populate results. Then, click Go.
- Remove Rooms that are not Required for Analysis
- Open “_Lighting Analysis Room Schedule”
- Uncheck the following rooms that should not be included in the daylighting analysis:
- AV/Tech (1)
- All toilet rooms (6)
- Jan Closet (1)
- Mechanical (1)
- Electrical (1)
- Coat Room (1)
- All storage spaces (4)
- Garage (1)
- Regenerate result
- Account for automated shading
-
- LEED also specifies that if a room has automated shades, it does not have to fall into the specified threshold. Let’s consider that some of the South facing classrooms have automated shades. Update the schedule as you did before, checking the Automated Shades box for the following rooms. (And remember that changing these settings will ultimately change your results, so be sure to capture the conditions before the change)
- Themed Classroom 106
- Themed Classroom 108
- Themed Classroom 110
- Regenerate result
- LEED also specifies that if a room has automated shades, it does not have to fall into the specified threshold. Let’s consider that some of the South facing classrooms have automated shades. Update the schedule as you did before, checking the Automated Shades box for the following rooms. (And remember that changing these settings will ultimately change your results, so be sure to capture the conditions before the change)
Additional Revit Resources:
- About LEED Daylighting Analysis for Revit
- This page describes what exactly the LEED plug-in does, and how you can use it.
- Lighting Analysis Workflow
- This page covers the basic workflow. Be sure to read the subsequent pages as well that dive into the steps called out here.
- Manage Analysis Planes
- Here are some tips on how to set up your analysis planes. The analysis plane is automatically generated 30” above floors.
- Generate and View Results
- After you set up your analysis you’ll be able to view your results within your Revit model.
- Manage Rooms and Room Parameters
- One very useful feature of the Revit plug-in is the ability to access and modify the room schedule. From here you can select which rooms are included in the analysis and which rooms have automated shades. You can also see the specific illuminance breakdown for each room.
- Using Analysis Results for LEED Submission
- You can use the results from Revit for your LEED submission. This page outlines that process in detail.
- Cloud Credit Pricing
- The analysis is priced with cloud credits. This page describes just how much a cloud credit is worth in terms of daylighting analysis.
- Managing Costs
- Since you’ll be paying per analysis, here are some tips for keeping costs down.


